How To Build a Token-Gated Music NFT App
With Pinata Submarine

In 2021, NFTs took flight. It was a long time coming, with CryptoKitties and CryptoPunks both launching way back in 2017. But when NFTs finally gained traction, they did not let up. This boom has led to creative uses of NFTs beyond their investment and artistic value.
One of the more creative uses of NFTs that also adds extra value is to leverage them as transferrable keys to exclusive media. This may have been pioneered by Yuga Labs and Bored Ape Yacht Club, but NFT projects large and small have jumped on board. The problem is, how do you build a token-gated media experience in addition to building your core offering? This is a challenge technology startups face every day. How do you build something on the side that has value and that can increase the adoption of your core product without spending more effort on the side project than the core product?
In the case of Yuga Labs, they invested significant resources and time into building token-gated games and experiences. Rolling everything by hand. Dedicated engineering time. However, it doesn’t have to be a massive engineering project. Pinata, one of the first IPFS-based tools/platforms on the market, has been making life easy for developers in this space for years now. And with Pinata Submarine, developers can easily build full-blown token-gated media platforms with a fraction of the time and resources invested.
Pinata Submarine is essentially private IPFS. Pinata has built on top of the IPFS protocol since its inception. And since the early days, we heard customers asking for a way to store media privately. IPFS is inherently public. The solution, early on, was to create custom, enterprise-level infrastructure of IPFS nodes that don’t connect to the main public network. That was never going to scale. So, after hundreds of conversations with customers in 2020 and 2021, we built Pinata Submarine—private IPFS for individuals. Content is not broadcast to the public network and can only be accessed with a time-based access token generated by each customer.
We’ve written in the past about how to build token-gated solutions using the Pinata Submarine API. Today, we’re going to use an even simpler solution—the Pinata Submarine SDK. The Pinata Submarine SDK is a Node.js SDK that will accelerate your development time even further.
Quick side note: If you are a non-technical creator who is about to close this post because you saw “API” and “SDK” and “developer”, checkout submarine.me, a no-code token-gated media solution.
Today, we’re going to build a simple NFT-based music player using the Pinata Submarine SDK.
Getting Started
For this tutorial, you’ll need the following:
- Node.js v16 or higher
- Text editor
- Pinata Picnic Plan account
Pinata’s Submarine capabilities are only available on paid plans, so if you haven’t done so, sign up for at least the Picnic Plan. In doing so, you not only get access to Submarine but to Rich Previews, Image Optimization, Video Streaming, Global Caching, Custom Domains, and more.
Once you’ve signed up for your account and upgraded to the Picnic Plan or beyond, you’ll need to create a Submarine API Key:

Now, you’re ready to begin.
Setting Up The Project
We’re going to be using Next.js to build our project. It leverages the power of React and extends it with serverless functions. The project itself will include the following:
- A landing page
- Authentication using WalletConnect and WAGMI
- Message signing to verify token ownership
- An upload button
- A share link
- A token gated music player
Sounds like a lot, but remember, we’re using the Submarine SDK to speed things up. Let’s dive in!
Fire up your command line, switch into the project directory where you keep all your awesome projects and run the following command:
npx create-next-app token-gated-music-playerWhen everything is done installing, change into your new project directory:
cd token-gated-music-playerLet’s go ahead and install our remaining dependencies, including the Pinata Submarine SDK:
npm i pinata-submarine wagmi ethers siwe next-authWhen all of that has finished installing, we can get to work on building our frontend. Open the project in your favorite code editor, and find the pages folder of the project. Let’s start by setting up our authentication system.
Authenticating With Sign In With Ethereum
Next.js includes serverless functions out of the box, so there will be an api folder in the pages folder of the app. Open that up, and create a nested folder called auth. Within that folder, we’re going to create an odd looking file name, but it’s designed to handle multiple different authentication requests. That file name should be [...nextauth].js.
So your full structure and location of the new file should be:
pages/api/auth/[...nextauth].js
In that folder, add the following code:
We are making use of Sign In With Ethereum (SIWE) here. You can read more on the implementation we are using here.
The library next-auth helps us with session management, and SIWE adds a layer to Ethereum message signing that includes long- (or short-) lived sessions.
At the top of the file, we have included a validateNFTOwnership function. This function extends the SIWE functionality to check if the wallet in question owns the correct NFT. You’ll notice we’re using a few environment variables, so we should go ahead and set up our local .env file.
Create a file called .env.local. In that file add the following:
NEXTAUTH_SECRET=SOME SECRET PASSWORD
JWT_SECRET=ANOTHER SECRET PASSWORD
DOMAIN=localhost:3000 // In production this will be the URL of your web app
ALCHEMY_ENDPOINT=ALCHEMY ENDPOINT
SUBMARINE_KEY=YOUR PINATA SUBMARINE KEY
GATEWAY_URL=https://yourdedicatedgatewayurl.com
CONTRACT_ADDRESS=NFT CONTRACT ADDRESS
Let’s walk through this file and talk about how to get the proper values for it. First, we have NEXTAUTH_SECRET. This is a secret that helps ensure valid requests are accepted during the authentication flow. This can be any string you want. I like to generate secure passwords with a password manager for this.
Next, JWT_SECRET acts very similarly to NEXTAUTH_SECRET. The difference is it’s used in JWT signing and verification as part of the SIWE flow. I recommend this be a different secret than the one used for NEXTAUTH_SECRET.
The DOMAIN is the URL where the app will be access (with no http or https).
Since we are validating NFT ownership, we need to leverage an Ethereum node. Alchemy’s service is fantastic (and free), so sign up for an account here, and create an Ethereum Mainnet endpoint (or choose a testnet if you prefer).
Next, you’ll need two values from your Pinata account. First, you’ll need a Submarine API Key. You can access this by logging into Pinata, clicking the menu in the top-right corner, then clicking on Submarine Keys. Then, you’ll need to grab your Dedicated Gateway URL from the Gateway page in Pinata. Make sure you include the https:// portion of the URL in your variable value in the file.
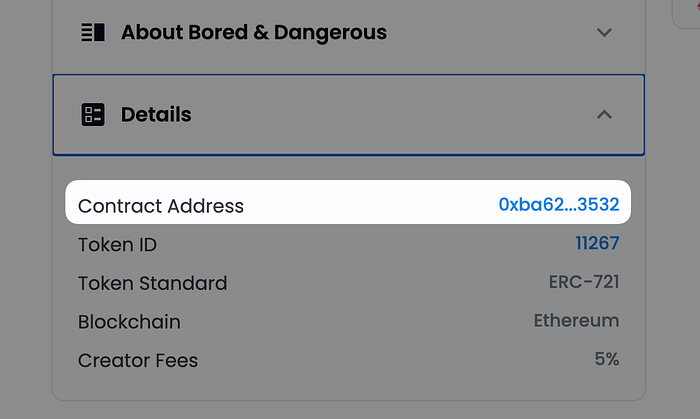
Finally, you need to just enter the CONTRACT_ADDRESS for the NFT you plan to validate ownership of. You can get this by looking at OpenSea’s details view of the NFT:
Now that our .env.local file is saved, let’s finish up the supporting functionality for our authentication endpoint. You may have noticed there is a helpers function called abi that gets called as part of the NFT validation process. That means we need to 1) create a helpers folder and 2) create a file that includes that function.
So, go ahead and create a helpers folder in the root of your project directory. In that folder, create a new file called erc721.js. In that file, add the following:
This is basic ERC721 ABI. It won’t include any custom functions a project may have written into their contract, but it includes everything you need to verify ownership of a token in the collection.
Now, let’s build our backend functionality (using serverless functions and the Submarine SDK!).
Setting Up The API
Our API is going to be pretty simple. It will be comprised of 2additional files now that we have taken care of the authentication API endpoint. The 2additional files will be:
- Media
- Access Token
The Media endpoint will handle both GET and POST requests. As you might imagine, it will allow for an authenticated user to upload Submarined content and it will allow for an authenticated user to request Submarined content.
Go ahead and create a new file in the api folder called media.js. In that file, add the following:
This file includes a lot. We have two functions that sit outside the route function itself: getIndex and saveFile. We are going to be, of course, uploading a private file using Pinata Submarine. But then we are also going to build an array of files that can be returned to the client.
Out of scope in this tutorial will be pagination. The result list will be limited to 10 items, but the Pinata Submarine API supports up to 50 items being returned at once. So feel free to adjust that and implement pagination as needed.
On the frontend, which you’ll see soon, we are uploading using multi-part form data. So, in our saveFile function we need to be able to parse that data. We’re using the formidable library to help us with this. By taking this path, we don’t even have to write the file to disc temporarily. We just hold the info in memory.
One thing to note is that when we upload, we include some metadata with the file. This metadata is just to make it so it’s easier to query for data in Pinata. I used a key called uuid and then passed in an identifier. You could use whatever key you want and whatever associated value you want, though.
When using the Submarine SDK, you can see the upload and associating the metadata is a single line of code.
On the GET request, we make use of the getIndex function. This function makes a request to fetch Subamrined content and filters it to only content that matches the metadata we added. We return that to the client, and you’ll soon see how we can leverage this info to actually display our music files in a playable format.
Let’s set up the other API route now. Add a file in the api folder called accessToken.js. In that file, add the following:
As with our other routes, we have a check (thanks to SIWE) to ensure the user making the request is authenticated. Then, we simply take the requested id and CID to generate an access token and return the fully usable link (including access token) to the client.
The access token is important because remember that Submarined content is stored on private IPFS nodes. The middleware layer Pinata has created requires an access token to allow the content to be served.
Now that our backend is done, let’s create the front end app!
Wiring Up The Front End
This is a simple example app designed to inspire you to go out an build something more complex. But the functionality you’ll need is all there:
- Authentication
- Token Validation
- Upload
- Download
- Rendering
We’ll be making use of the WAGMI library to make interacting with Ethereum-based wallets easier. We previously installed the library, so the first thing we need to do is connect it to our Next.js client. In the pages folder, open the _app.js file and replace the code in there with:
Not a whole lot to go over in this code. Just know that it wraps our entire client-side code in a provider that makes using the Ethereum-based hooks from WAGMI easier.
Now, the root of the app will be the index.js file. We need to update this page to handle authentication and checking for a session. The goal is to allow people to prove they own a particular NFT and if so, they will be authenticated and redirected to the music page. If they are already authenticated (thanks SIWE!), we will detect that and automatically redirect them.
The page itself is simple. We let the user know that they must own a specific NFT to access the app. Feel free to customize what NFT you want to use here. We have a sign in button that connects to a function that leverages SIWE to do a couple of things for us behind the scenes. First it gets a session nonce to help us avoid signature replay attacks when validating ownership of the NFT in question, and it prompts the users to sign an EIP712 compliant message.
When the message is signed, the signature is verified on the backend as part of the SIWE authentication process. Assuming the user owns the NFT, they will be redirected to the music page in the app.
Which means we need to create a music page.
In the pages folder, create a new file called music.js. Next.js automatically handles routing for us based on files names within the pages folder. So the music.js file will be accessed at http://yourapp.com/music.
In the music.js file, add the following:
This file might seem like a lot, but there are really only three things happening:
- Upload music
- Fetch music
- Display audio player
In a production app, you’d probably want to limit the types of files that can be uploaded (especially if this is a music/audio only app). You might want to style things up a little more as well 😉.
When the index file of Submarined music is loaded, we loop through that and use our accessToken endpoint to generate URLs for each file. Once we have those URLs, we map them and load the audio files as soon as possible.
You can imagine that when you’re working with more than 10 files at a time, this could cause performance issues. Fortunately, Pinata’s Dedicated Gateways can handle large volumes of requests without problem. So your job is limited to creating a nice interface and experience for the end user.
With this file complete, the app—in its barest form—is done. A community of people who own NFTs from a particular collection can participate in a (legal!) music sharing service.
Conclusion
Music NFTs are hot, but we’ve only just started to scratch the surface of what’s possible. With this guide, you can create an entire community around private music and public NFT music. But hopefully it will inspire you to do even more with IPFS and Pinata!
Happy Submarining!